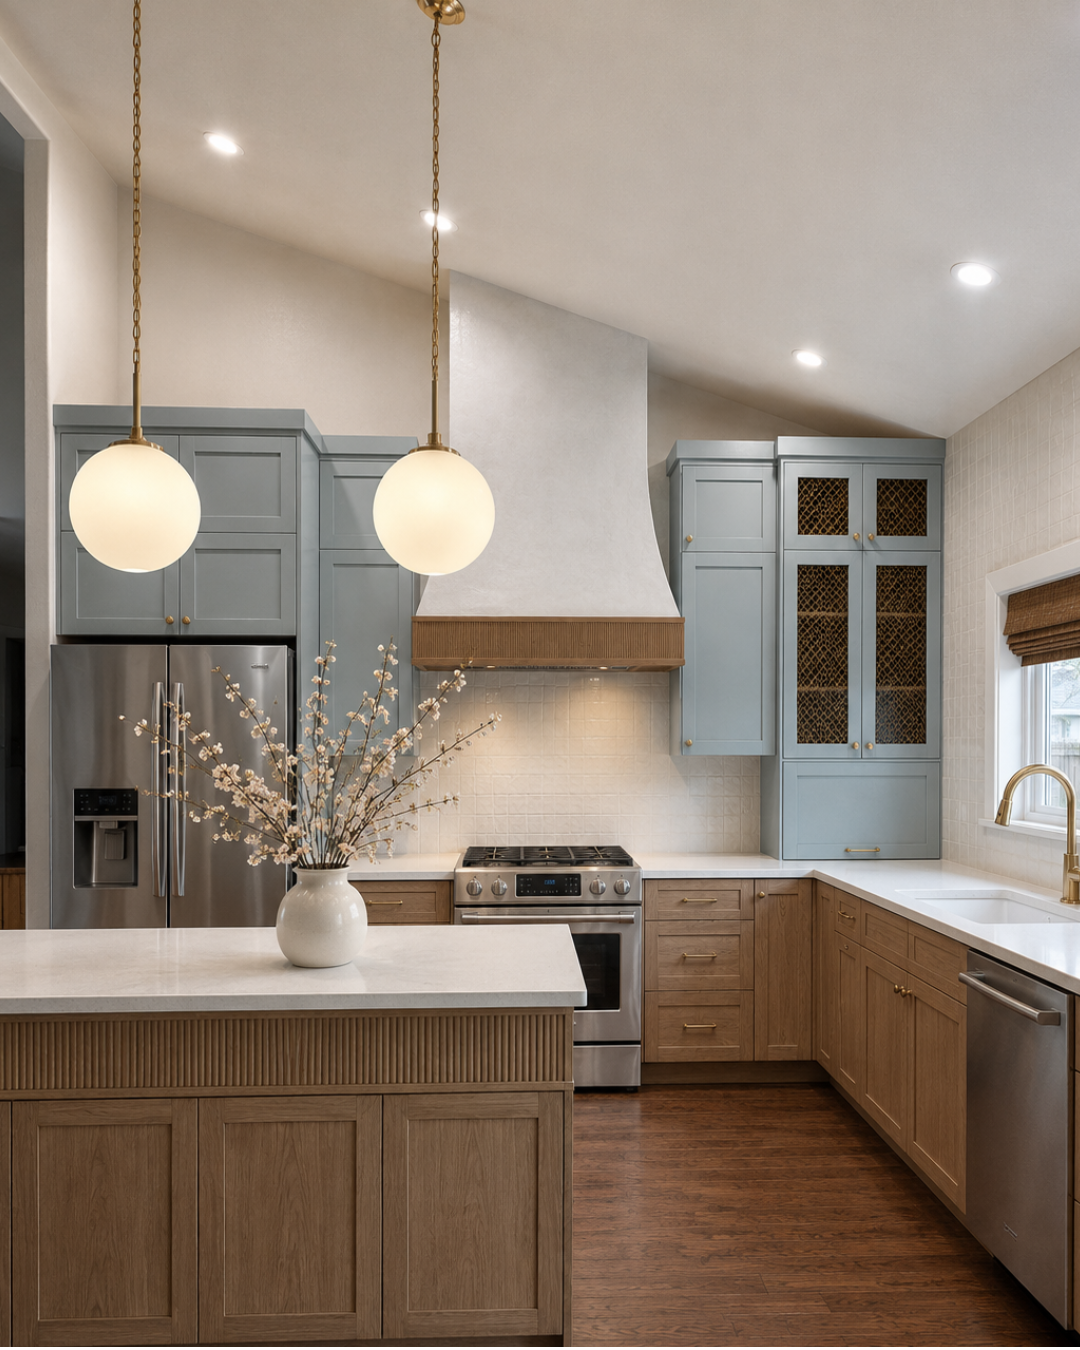
DIY Kitchen Remodel: Turning Our Builder-Grade Kitchen Into Something Completely Custom
When we moved into our house, I instantly knew the kitchen was going to be a problem.
Our house was built during the recession, and the kitchen had pretty standard builder-grade finishes. But the bigger issue wasn’t how it looked. It was how poorly the space worked.
We had a tiny 21-inch pantry, almost no useful drawers, very little functional storage space, and a full-depth French-door refrigerator that left only 27 inches between the refrigerator handles and the island.
Two people couldn’t comfortably work in the kitchen at the same time.
And yet, as a designer, I could see SO much unused potential. I’ve designed kitchens for more than 20 years, and I knew we didn’t need a larger room… we needed a much better kitchen layout.
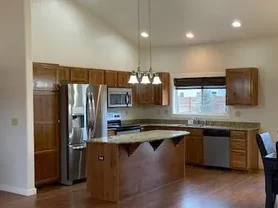
The Kitchen Before
When we first moved in, the old cabinets were an orange-toned wood that I quickly gave a fresh coat of paint in Sherwin-Williams Blustery Sky. I also used marble epoxy to cover the gold granite, peel-and-stick backsplash tile, and put a butcher block on the island. This was all temporary as I knew a full kitchen remodel was in our future.
I loved adding color, but I always knew the blue cabinets were temporary.
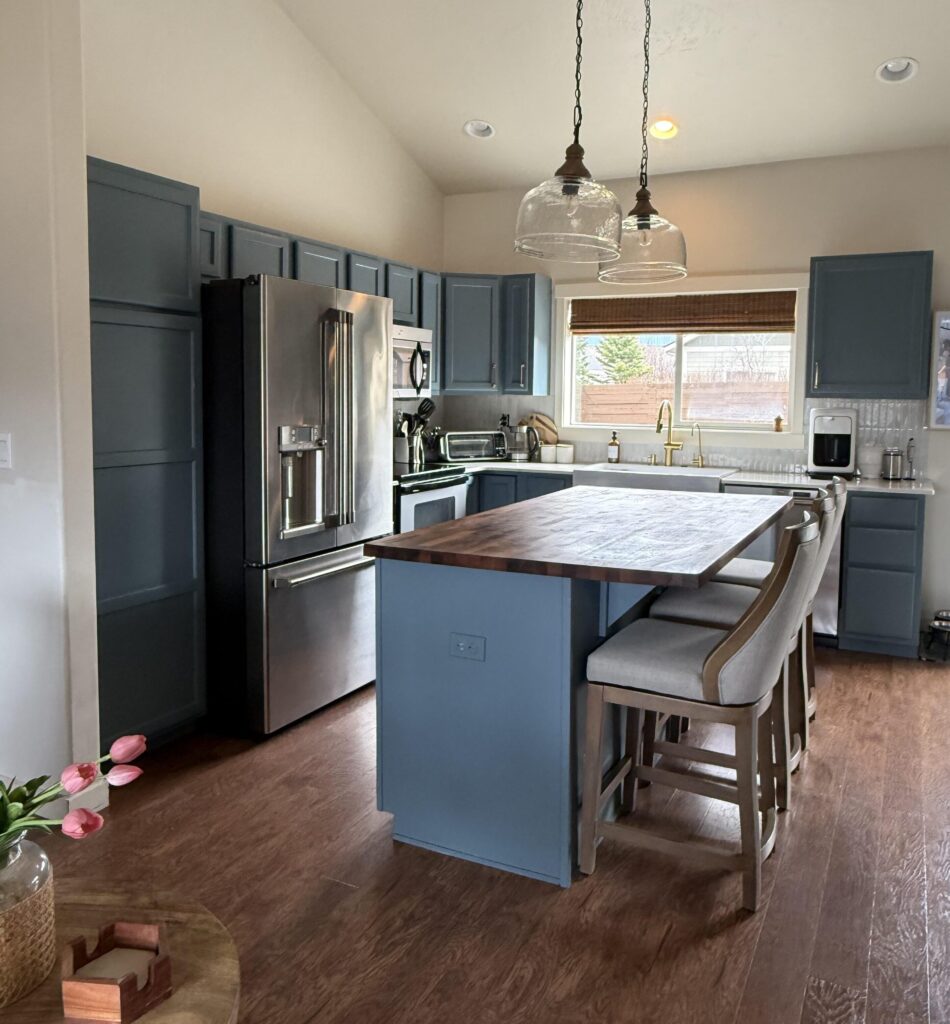
The 30-inch upper cabinets felt especially small on a wall where the ceiling starts at nine feet and climbs to more than 13 feet. There was all this beautiful vertical space—and we weren’t using it.
The storage was even more frustrating.
Our pots and pans were stacked inside lower kitchen cabinets, with lids falling everywhere. The island had cabinets with small recessed shelves that required practically crawling inside to reach things in the back.
I wanted drawers. I wanted pullouts. I wanted a hidden garbage can. And most importantly, I wanted everything to have a place.
This wasn’t going to be a cosmetic refresh. It was going to be a complete overhaul and a complete kitchen makeover focused just as much on function as design.
Starting With a Solid Plan
Before ordering anything, I started with a solid plan.
I penciled out the entire kitchen layout and worked through the measurements until I knew exactly where everything could go. Accurate measurement was especially important because I was shifting appliances, changing cabinet sizes and trying to gain every usable inch I could.
And a few inches here and there made an enormous difference.
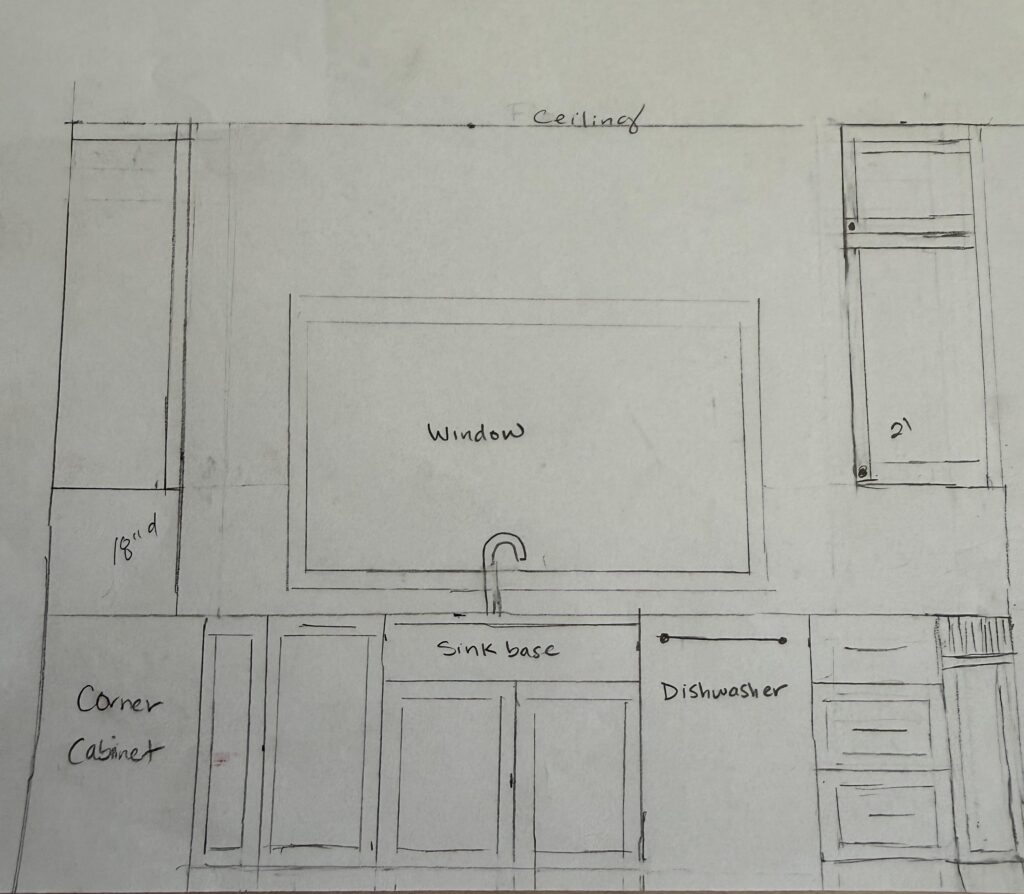
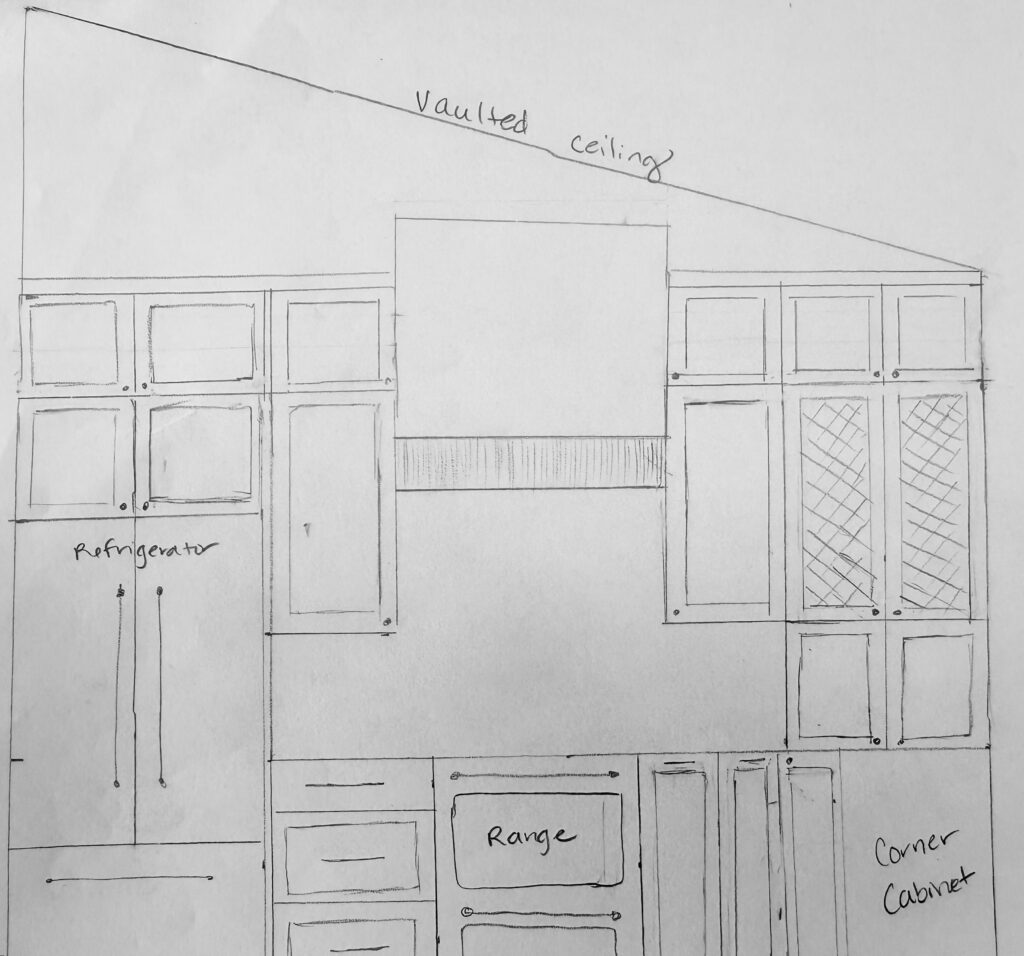
I moved the refrigerator 21 inches, shifted the range about 9 inches, and moved the entire island approximately 10 inches farther into the room.
The island itself gained 6 inches in depth and 17 inches in length, plus I moved the island out 10″. Previously, we had 27″ between the refrigerator handles and island, and now it feels so spacious!
On the sink wall, I gained approximately 15 inches of countertop, and on the range wall I gained another 21 inches.
The crazy part is that I didn’t increase the square footage of the kitchen at all. By reworking the layout, moving the island and extending the cabinet and countertop runs, the entire kitchen space feels almost twice as large.
Suddenly, we had workable countertops and enough room for two people to comfortably use the kitchen at the same time.
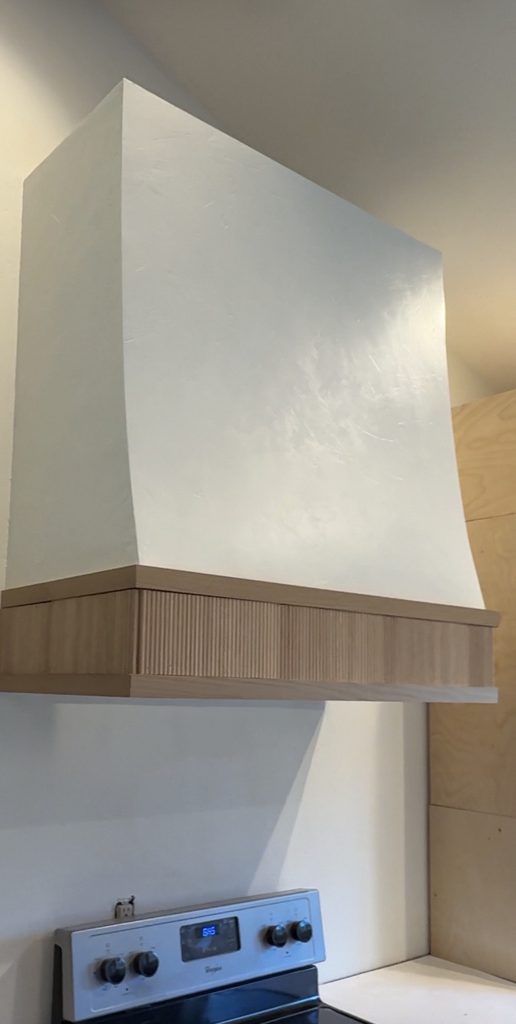
The microwave also moved from above the range into the island, where I’ll be installing a drawer microwave. That opened the entire back wall for the feature I really wanted, a big, beautiful custom hood.
Creating a Custom Kitchen on a Realistic Budget
MY MOOD BOARD FOR INSPIRATION
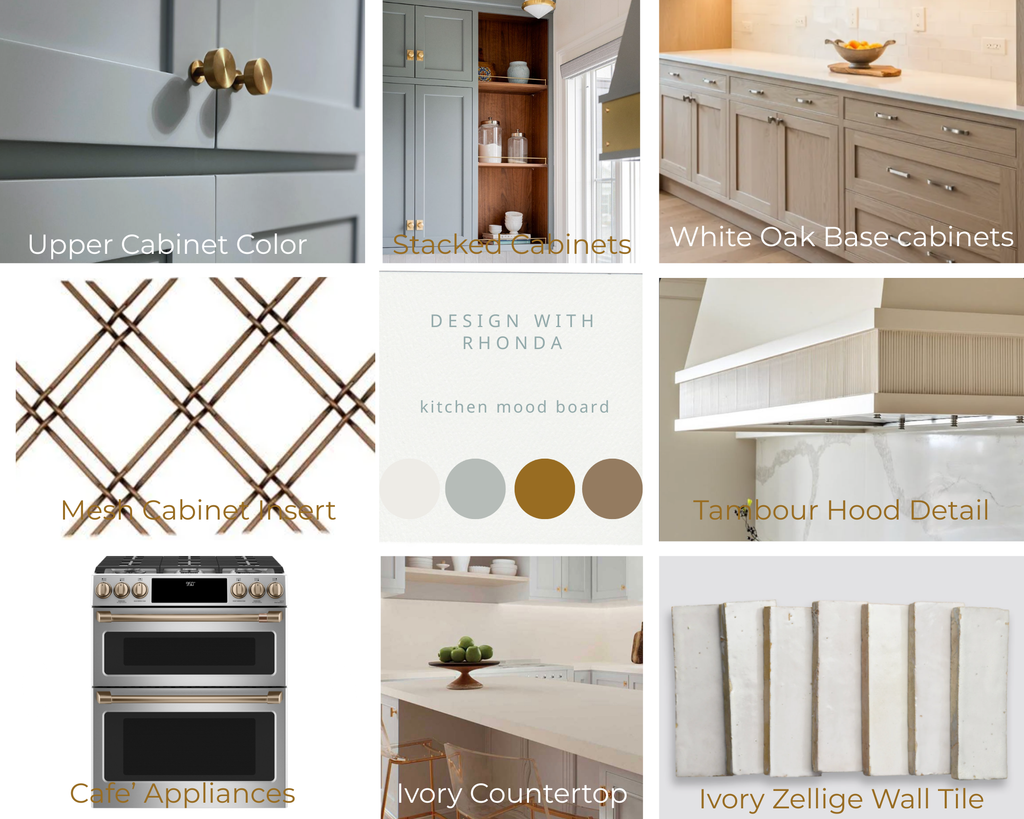
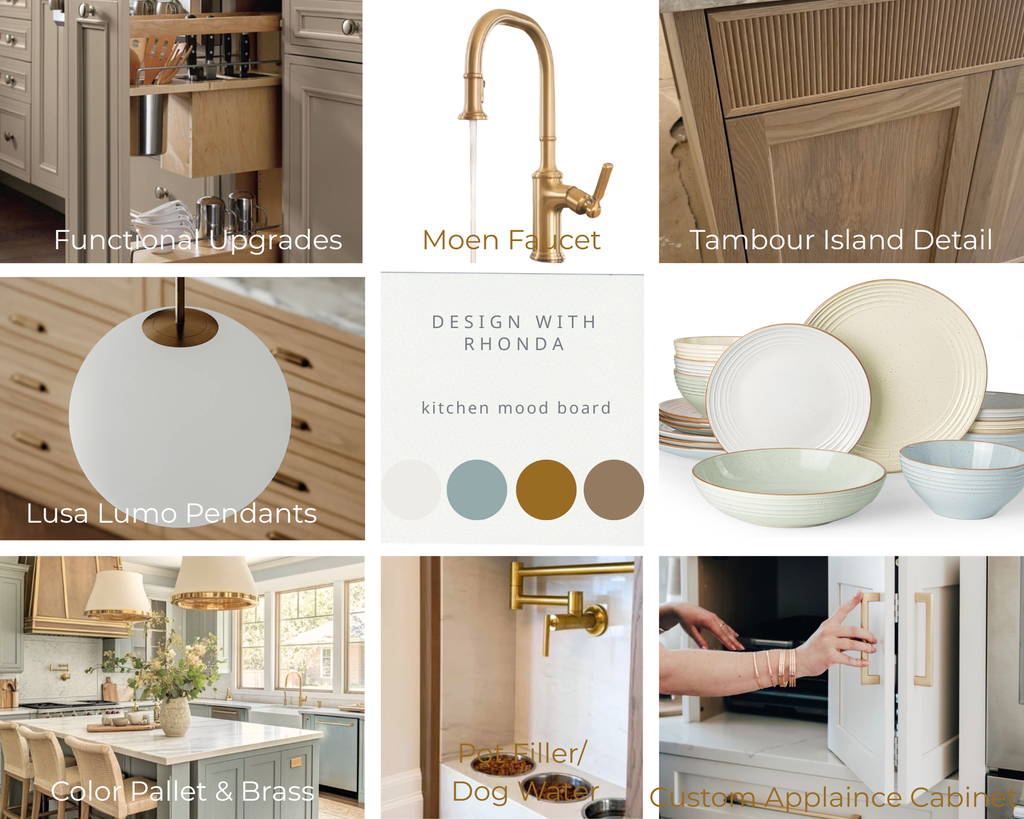
I wanted this kitchen to look completely custom with designer touches, but I was also working with a realistic budget. I wasn’t interested in paying an inflated custom-cabinet price simply to get the look I wanted.
For the base cabinets, I used ready-to-assemble white oak cabinets from Home Depot.
They arrived quickly, were surprisingly easy to assemble and install, and have soft-close doors and drawers. I’ve been extremely pleased with the quality.
Choosing the RTA cabinets was a good choice for this remodel because they gave me the quality and warm white oak look I wanted without paying for fully custom base cabinets.
But I didn’t just install them straight out of the box.
I added custom moldings, Shaker-style details to the island, beautiful brass hardware and white oak tambour to give fairly accessible cabinets a much more custom appearance.
This is one of my favorite design tricks: spend strategically on the details people notice rather than assuming you need the most expensive starting point.
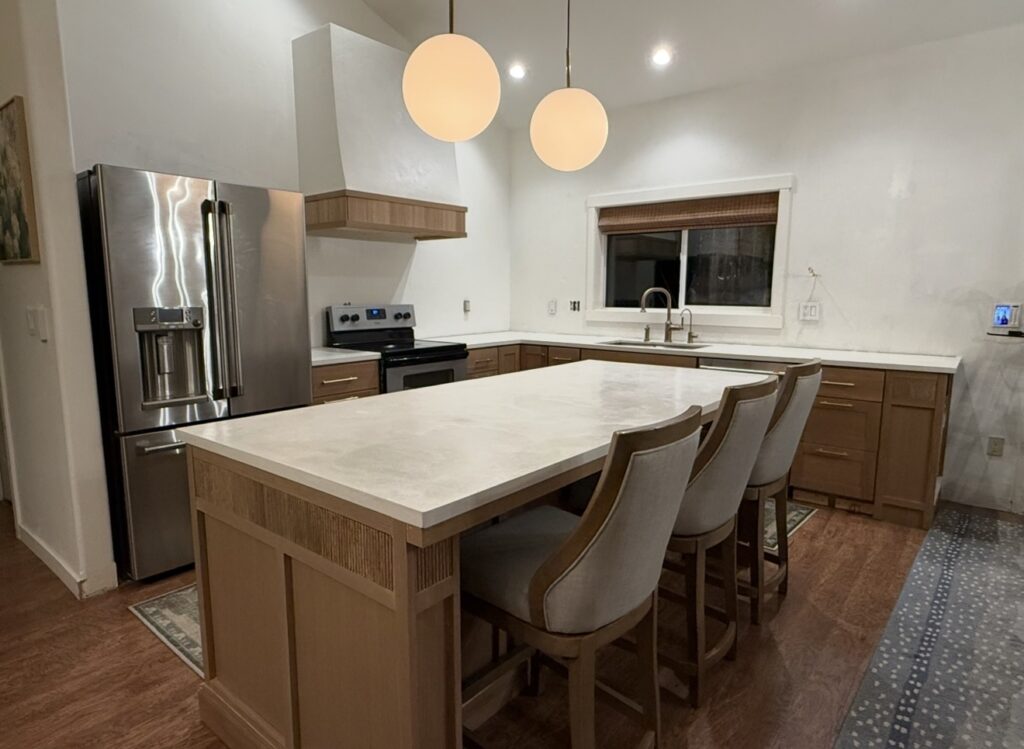
The tambour in particular transformed the island. I’m also carrying that same white oak detail onto the hood so the two areas relate to one another.
Building My Own Upper Cabinets
For the upper cabinets, I decided to take a completely different approach and build them myself.
I wanted much taller cabinets that took advantage of our ceiling height, and I needed them to fit precisely around the custom hood.
But there was another reason.
I wanted to learn how to build cabinets.
If I could learn the skill while remodeling my own kitchen, I knew I could eventually build cabinetry for my laundry room, mudroom, office and countless other spaces.
I’m currently building eight upper cabinets and the cabinet doors myself using Kreg tools, including the Accu-Cut system, impact driver and pocket-hole jig.
Building them has been far less intimidating than I expected.
The uppers will eventually be painted Wales Gray by Benjamin Moore. I’ll build Shaker-style doors, and a couple will have small brass grates as accents.
Making the Storage Work Harder
One of my biggest goals with this DIY kitchen renovation was to maximize storage without making the room feel overwhelmed by cabinetry.
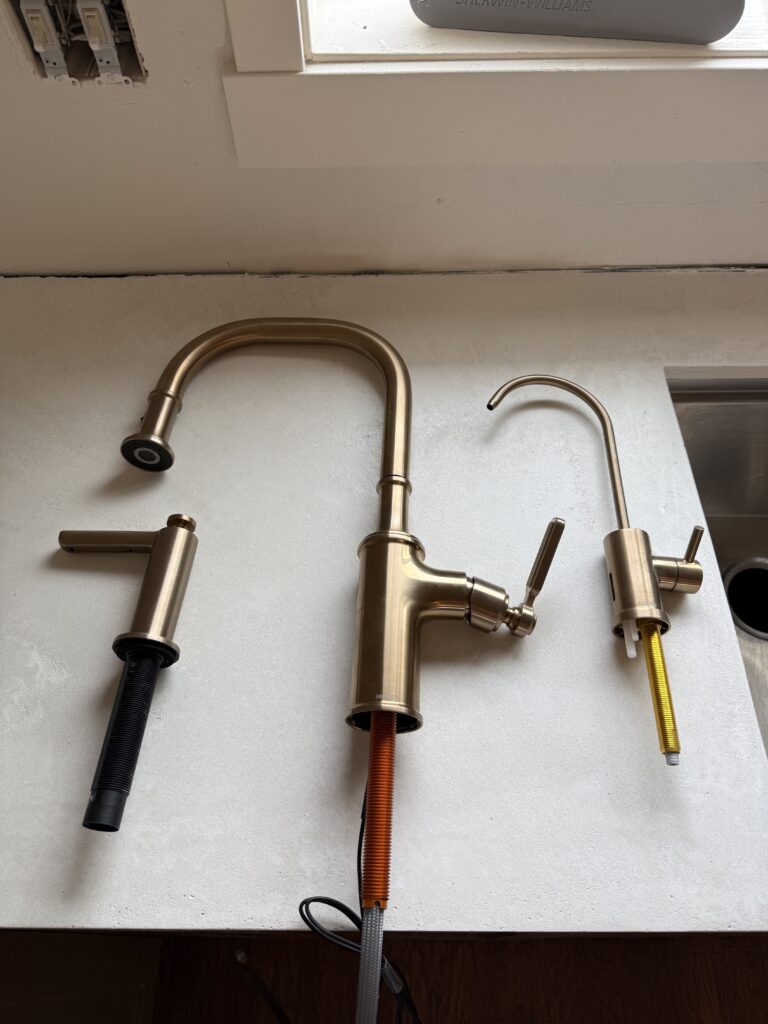
I’ve incorporated Rev-A-Shelf organizers and pullouts throughout the kitchen, including a hidden garbage pullout.
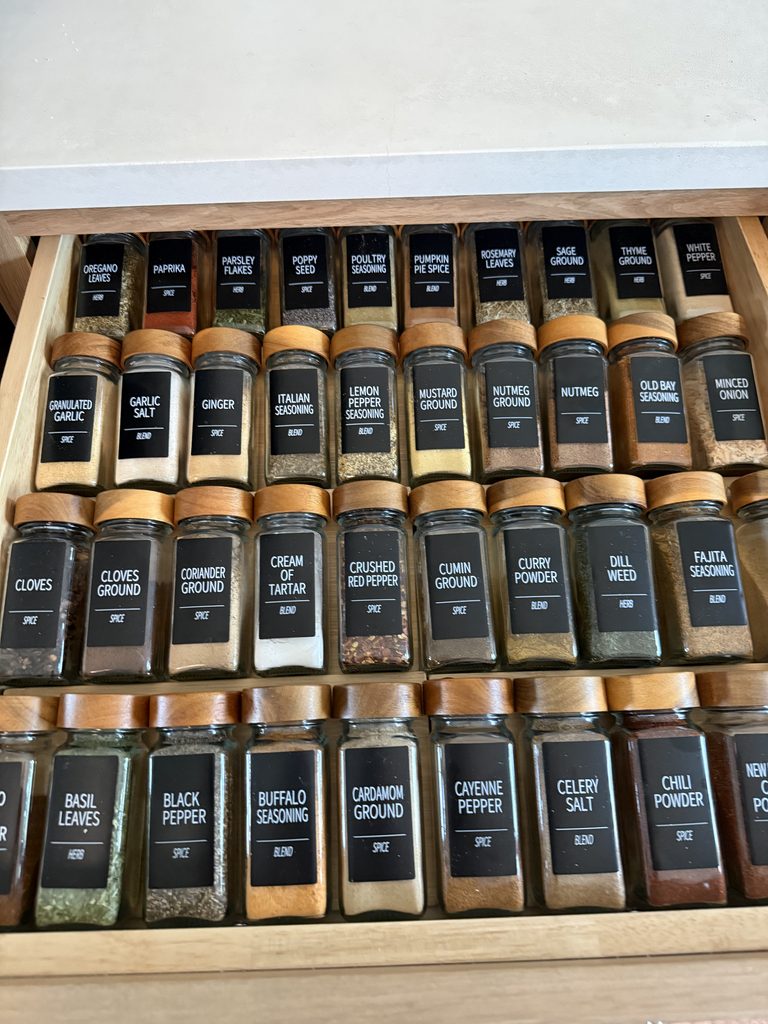
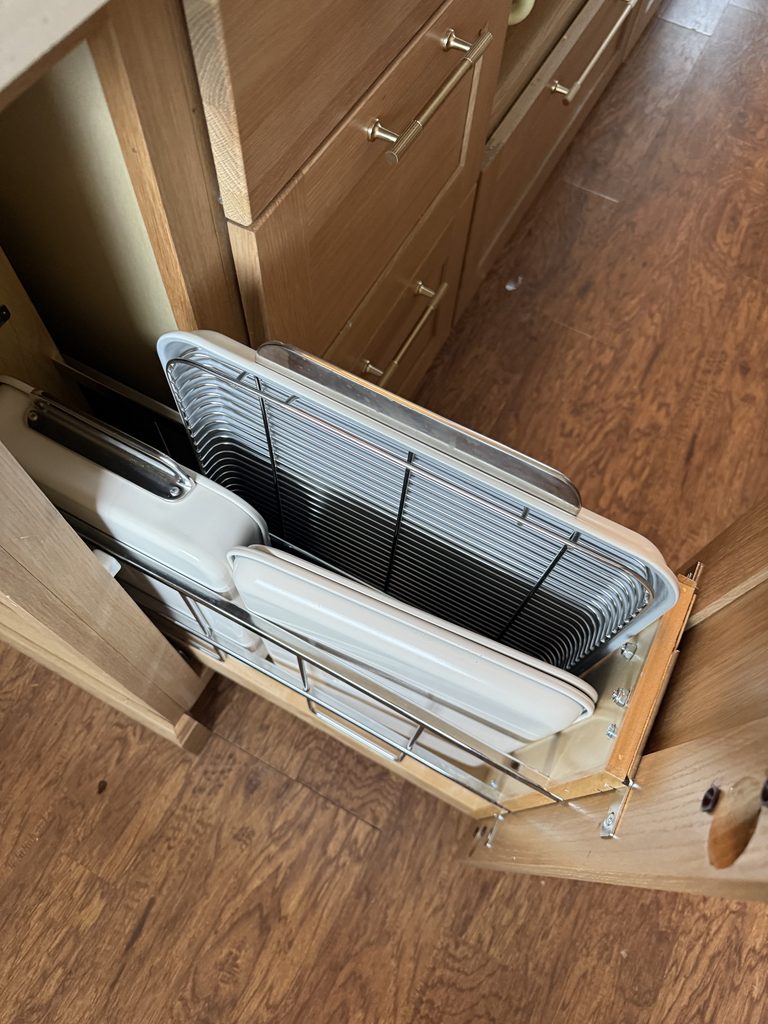
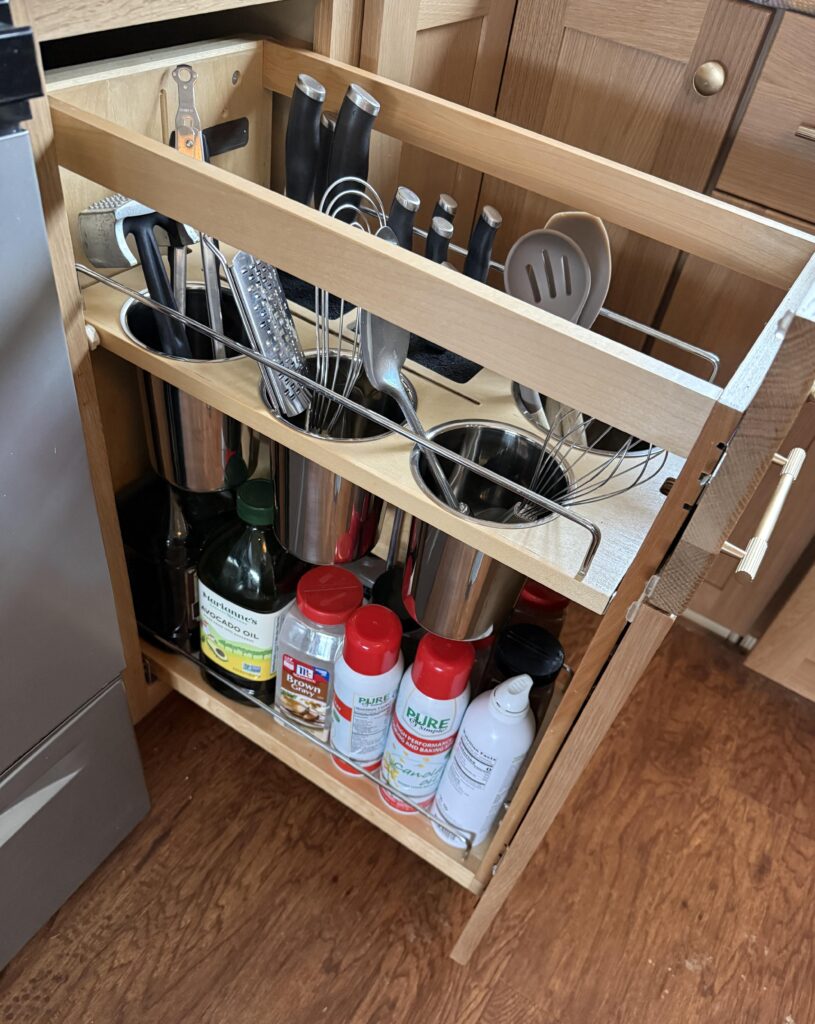
I even modified a couple of cabinets to make specific organizers fit. They were simple changes, but they’re exactly the kind of thing that can dramatically improve how a kitchen functions.
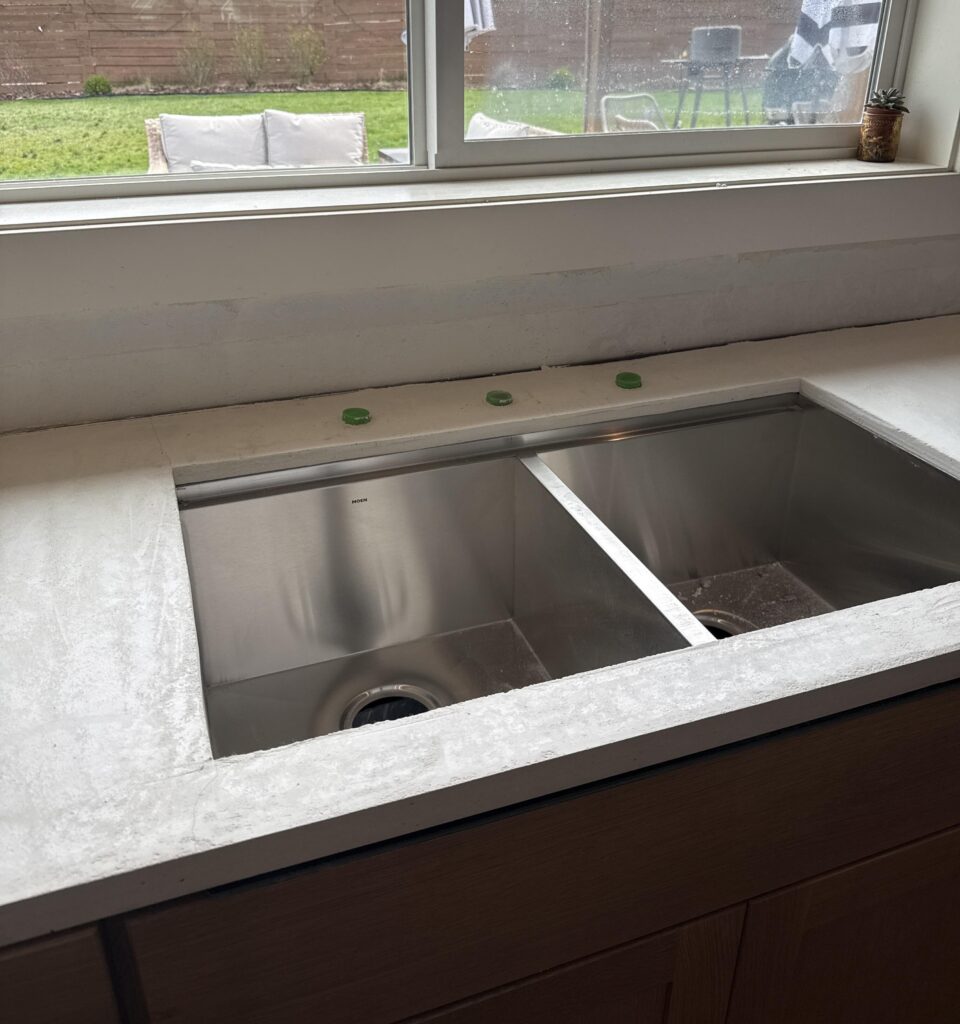
I also added a beautiful Moen undermount workstation kitchen sink. The integrated workstation gives me additional functionality right at the sink instead of taking up more countertop space.
And because I eliminated that tiny original pantry, I was able to gain valuable working room in the kitchen. I had already built new pantry cabinetry in the dining room just across the way, so I actually ended up with substantially more pantry storage than I had before.
The Dog Water Station
Then there are the ideas that absolutely no kitchen needs, but make it yours.
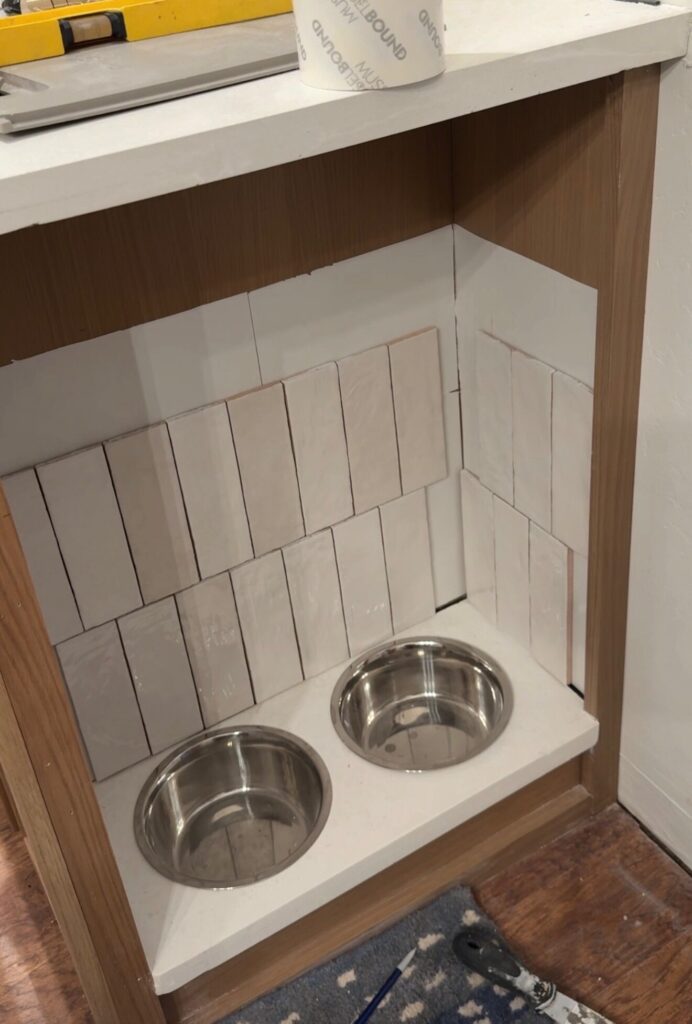
Our dogs’ water bowls were constantly in the way and getting kicked around, so I designed a dedicated dog water station into the end of the cabinetry.
And because apparently I couldn’t leave it at that, I added a small pot filler above it so we can fill their water bowls right there.
Necessary? Absolutely not.
Fun and functional? Absolutely.
Those are the details I love most.
Choosing the Look Without Choosing the Most Expensive Materials
One thing this remodel has reinforced for me is that you don’t always need the most expensive materials to create a beautiful, high-end result.
I knew I wanted creamy, organic countertops with the feeling of limestone. I could have chosen quartz countertops, but the options I loved were expensive.
So I decided to pour my own concrete countertops instead.
The new countertops cost under $2,000, and I estimate we saved approximately $15,000 by doing them ourselves.
There were definitely things I learned along the way, and a few things I wish I had understood before starting, but I’m thrilled with the polished finish and would absolutely do them again.
The island previously had butcher block, so changing to this light, creamy surface also helped give the entire kitchen a brighter, completely new look.
I’m taking a similar approach with the backsplash. I love the imperfect character of Zellige, but I found a more affordable tile that gives me a similar handmade look.
I’d rather choose materials because they create the design I’m after than simply choose what costs the most.
Designing a Kitchen With Personality
I didn’t want this kitchen to feel ordinary.
I wanted color. I wanted warmth. I wanted personal style. I wanted it to feel grand and cozy at the same time.
The kitchen style I’m creating is transitional, a mix of classic elements with cleaner, more updated details.
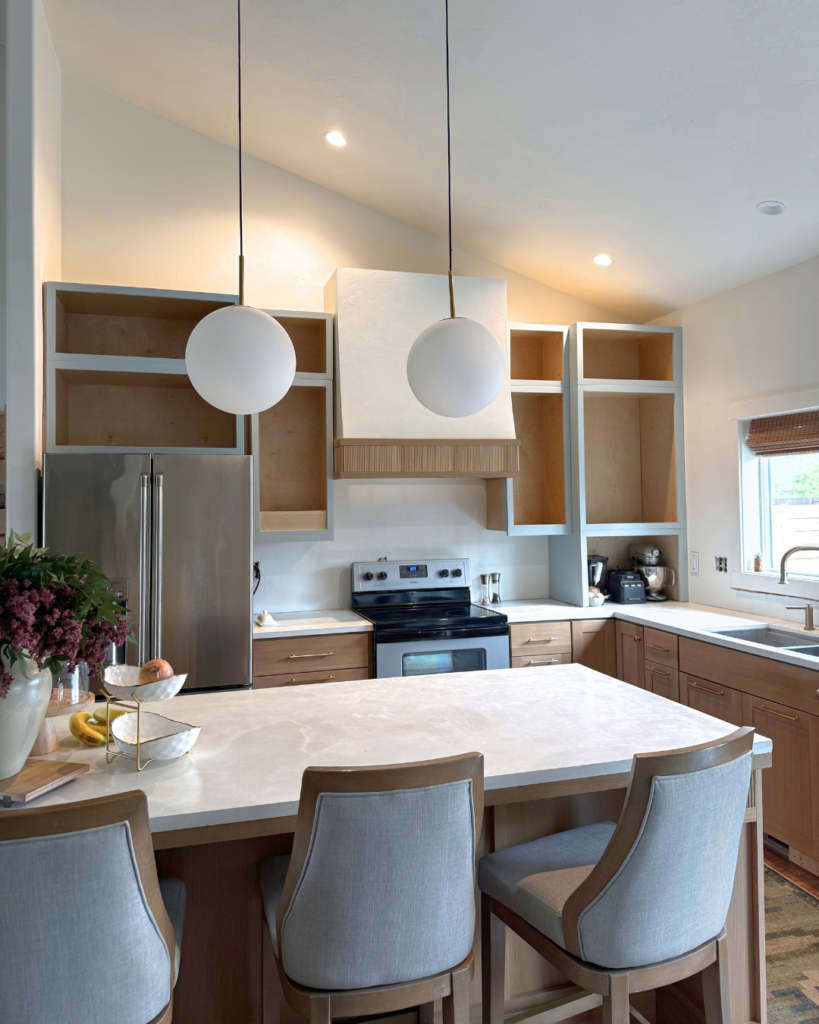
The white oak adds warmth. The brass adds another warm layer and a little polish. The Niebla Azul cabinetry brings in color and personality.
The plaster hood relates beautifully to the creamy concrete countertops, while the white oak tambour repeats the cabinetry and gives the kitchen a truly custom detail.
I also gave the walls a fresh coat of paint in Sherwin-Williams Cotton, which created a much lighter backdrop for everything happening in the room.
The hood and tall cabinetry are creating the focal point the original kitchen was missing. Eventually, that entire back wall will be finished with the full-height tile backsplash, making it the feature wall of the kitchen.
All of those choices together have completely changed the aesthetic appeal of the space without requiring every material in the kitchen to be the most expensive option.
Updating the Kitchen Lighting
Light fixtures are another huge part of this kitchen makeover.
One of the simplest DIY projects I’ve already completed was replacing the old recessed can lights with LUSA retrofit LED overhead lighting.
It made an incredible difference. The entire kitchen immediately felt brighter and fresher.
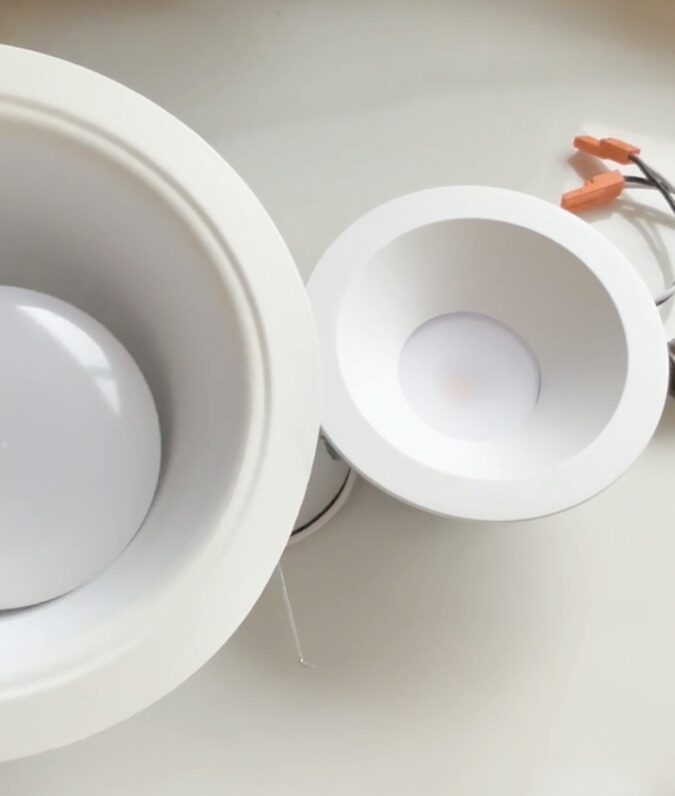
Use Code RHONDA15 for 15% off.
I’ll also be adding GlowStream under-cabinet lighting and over-cabinet lighting, along with new statement pendant lights over the island.
Because the island moved, I’ll move the pendant locations about 10 inches so they’re properly centered again. I also found new pendants that I couldn’t resist…so much personality and they’ll add a bit of fun to the kitchen.
I’m also relocating some electrical outlets and replacing some of the older switches as the cabinetry goes in.
They’re small details individually, but together they give the kitchen a much more intentional, finished look.
Where the Kitchen Remodel Is Now
This remodel has taken considerably longer than I expected, but it’s finally coming together.
So far, the lower cabinets and hardware are installed. The concrete countertops are finished. The custom plaster and tambour hood is built. The new layout is established. And I’m currently building the upper cabinets.
Still to come are the remaining upper cabinets, paint, moldings, light rail, backsplash tile, electrical work, under- and over-cabinet lighting, new island pendants, hood venting, dog-station plumbing, reverse osmosis, range installation, and microwave drawer.
The kitchen floor is one of the few major elements staying exactly as it was.
It’s still a work in progress, which is exactly why I’m sharing it now.
You get to watch this dream kitchen come together in real time.
The Biggest Lesson So Far
A successful kitchen remodel isn’t necessarily about having the biggest room or the biggest total budget.
It’s about making smart choices with the space and money you have.
Sometimes moving an appliance 9 inches matters. Sometimes the right tools allow you to build something you never thought you’d build yourself. Sometimes accessible cabinetry plus thoughtful custom details gives you the look you thought required professional custom cabinets.
We haven’t added a single square foot, yet the kitchen feels dramatically larger.
And while improving a kitchen can contribute to a home’s value, my first priority was creating a kitchen that works dramatically better for us every single day.
After more than 20 years designing homes, that’s still the part of kitchen remodeling I love most: seeing the potential in an ordinary space and figuring out how to make it work beautifully for the people who actually live there.
This kitchen already functions dramatically better than it did before, and it isn’t even finished.
And I cannot wait to show you what it looks like when it’s done.
A little note: Some links in this post are affiliate links, which means I may earn a small commission if you buy through them, at no extra cost to you. As an Amazon Associate I earn from qualifying purchases. I only share products I love, use, or would put in my own home. Thank you for supporting Design with Rhonda!
You may also like

The things I use, love and can’t stop telling you about.
Fashion, favorites and a little bit of life beyond the house.
Projects, renovations and the know-how to make those big ideas actually happen.
Finishing touches, seasonal inspiration and the details that make a home feel special.
Beautiful rooms, smart design decisions and ideas you can actually use.
What you’ll find around here


join me on instagram