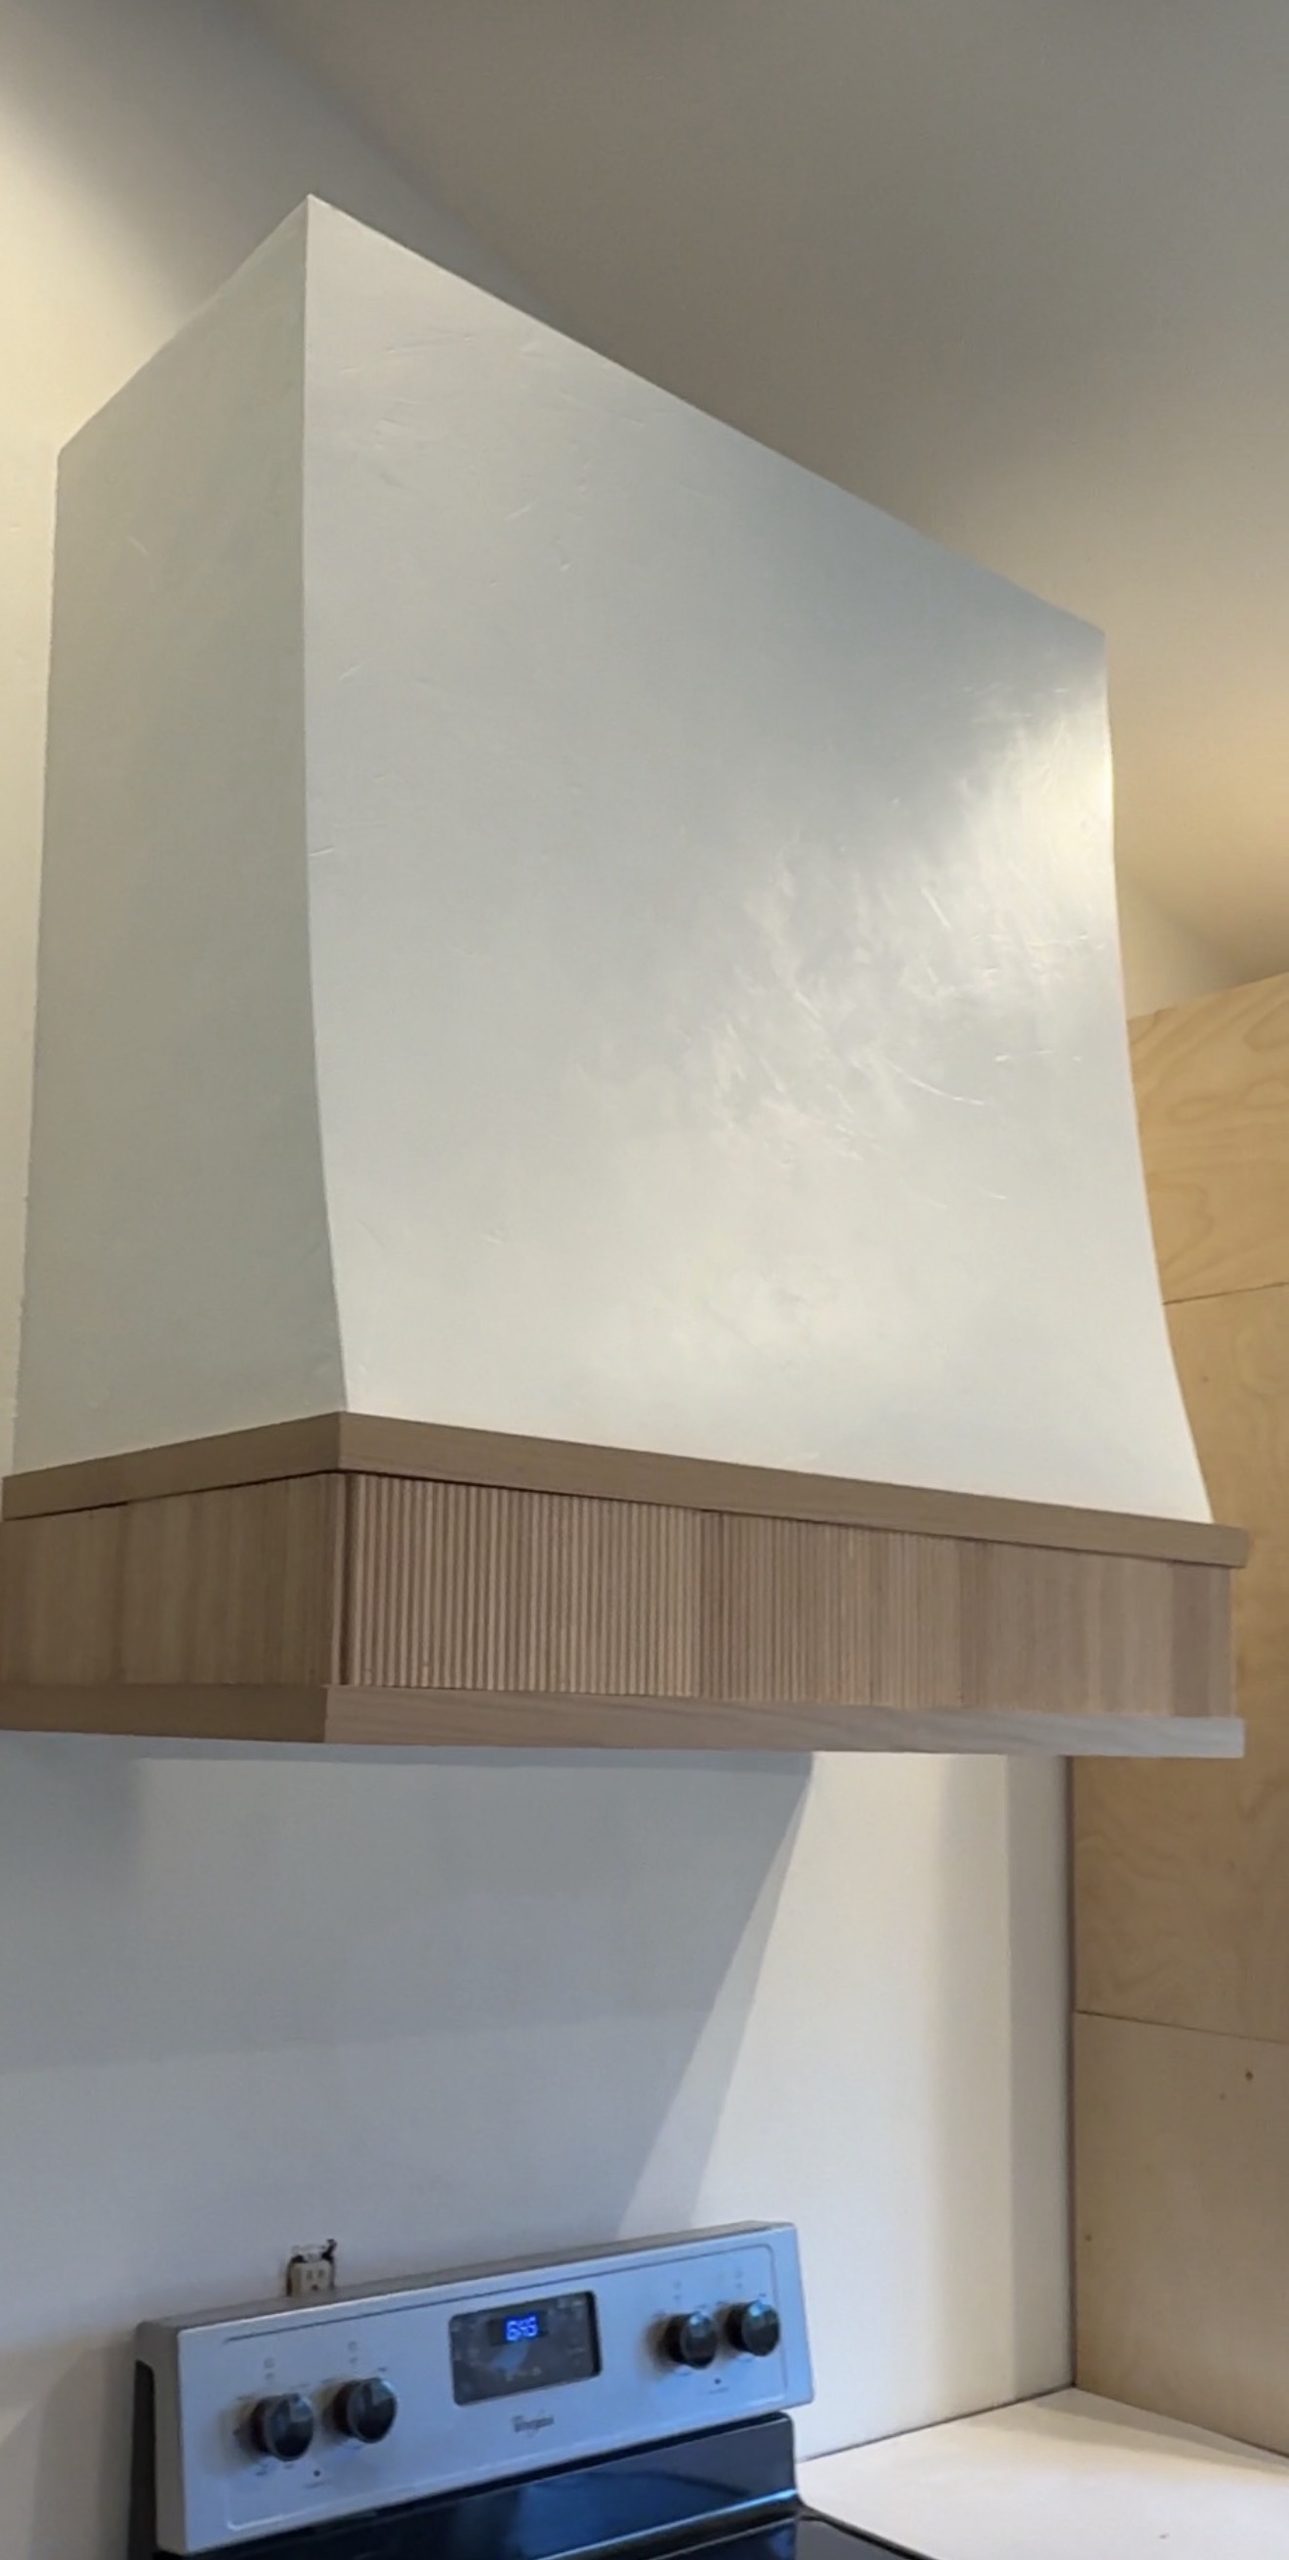
How I Built a Custom Curved Plaster Range Hood
I overthought this plaster range hood for months.
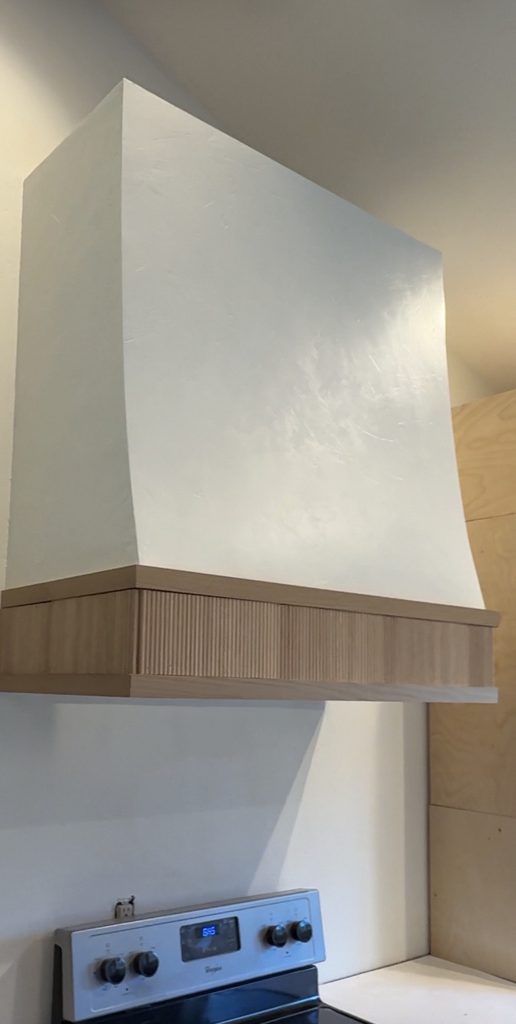
I knew exactly what I wanted: a substantial custom hood that would become a focal point in our new kitchen, with a soft concave shape, a subtle plaster finish and white oak detailing that tied it back to the cabinetry.
What I couldn’t quite wrap my head around was how to build that curve without making the whole project ridiculously complicated.
Turns out, I was making it much harder in my head than it actually was.
Once I broke the hood down into a few simple parts, a structural frame, plywood side profiles, horizontal supports and flexible plywood, the whole thing made sense.
And the trick I used to create the curve? No complicated radius calculations required.
Start With the Range Hood Insert—Not the Pretty Part
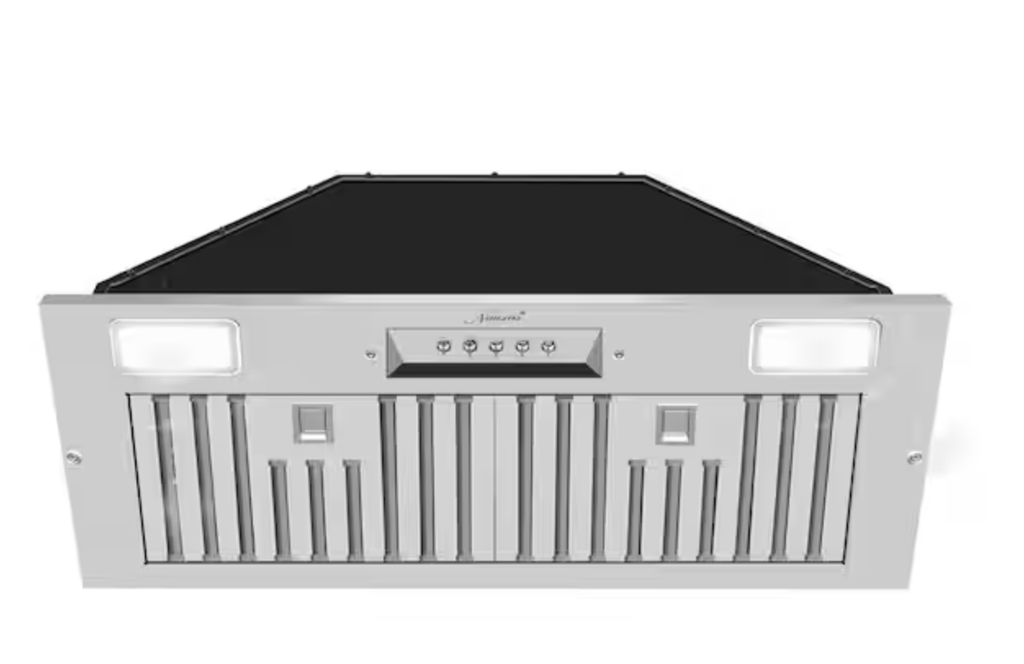
Before I designed anything, I purchased my actual vent hood insert and pulled the manufacturer’s specifications.
I used a 30-inch AKICON range hood insert with a 6-inch round duct. The insert required an opening of approximately 26½ inches wide × 10¾ inches deep.
Because this is a wall-mounted hood, the manufacturer’s specifications also determined how far above the cooking surface my insert needed to be installed. I chose 36 inches above the cooking surface, which gave me the height I wanted while staying within the installation requirements for my insert.
Your insert determines far more than just the size of the opening. It affects the mounting structure, ventilation, electrical requirements, clearances and ultimately the dimensions of the decorative hood surrounding it.
So if you’re building your own plaster hood, buy the insert first.
Do not simply copy my internal dimensions unless you’re using the same insert. Build this portion around the specifications for yours.
How I Designed the Size and Shape of My Plaster Hood
Once I had the technical requirements figured out, I could start thinking about the proportions.
I wanted the hood to feel substantial and architectural without overwhelming the cabinets around it. My range is 30 inches wide, and I personally prefer the look of a hood that sits a little proud of the range rather than stopping at exactly the same width.
I ultimately designed mine to finish at approximately 42 inches wide × 45 inches tall.
At 42 inches wide, it extends 6 inches beyond each side of my 30-inch range.
The height was much more visual.
I had sketched out approximately where I thought I wanted the hood to end in relation to the cabinets beside it, but I wanted to see it at full scale before committing.
So I actually stood on my countertop and drew the proposed lines directly on the wall.
Sometimes that’s the easiest way to answer a design question. Stop staring at the measurements on paper and look at the proportions in the actual room.
Before crown molding, my hood sits about 9 inches taller than the adjacent cabinets. Once the crown is installed, it will extend only about 3 inches above them.
Just enough to give it presence without making it feel enormous.
Designer Tip
Don’t determine the dimensions of a custom range hood in isolation.
Start with the manufacturer’s requirements for your actual insert, then consider your range width, adjacent cabinetry, ceiling height and the overall proportions of the wall.
Painter’s tape or pencil lines on the wall can tell you a whole lot more than a sketch on a piece of paper.
Why I Chose a Concave Front With Straight Sides
I knew I wanted a curved plaster range hood, but I intentionally kept the sides straight.
There were both aesthetic and practical reasons for that decision.
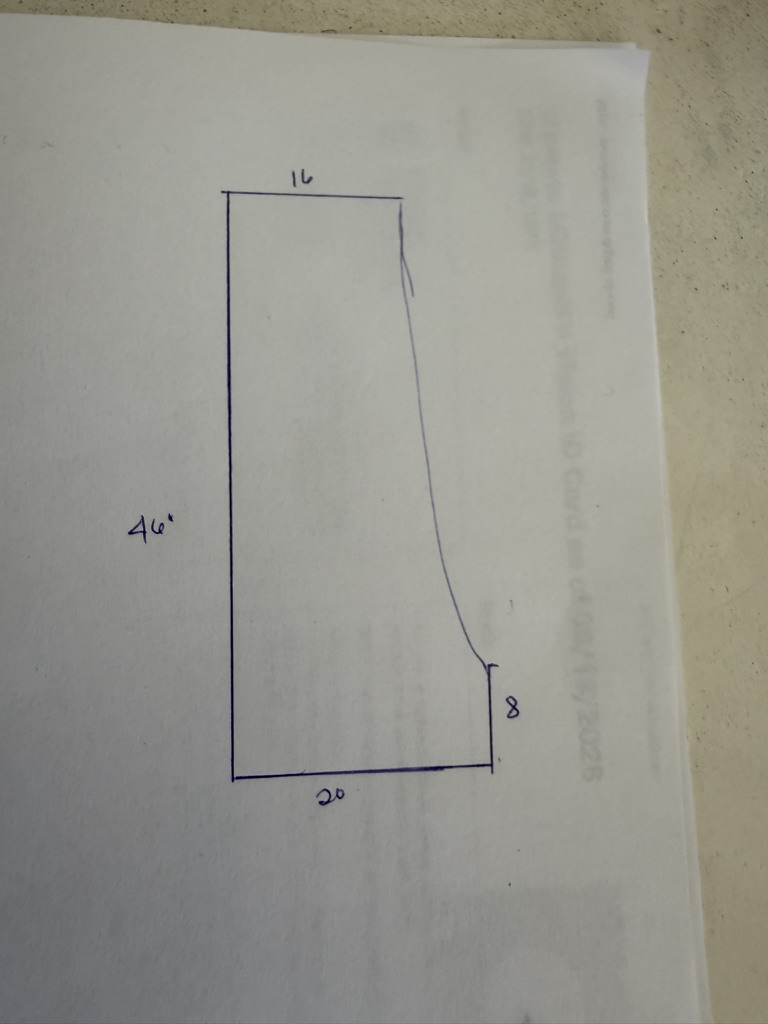
The hood is 20 inches deep at the bottom and 16 inches deep at the top. My adjacent wall cabinets finish at approximately 14 inches deep to the doors, so the hood projects beyond them and feels like a separate architectural feature.
The final 8 inches at the bottom remain straight rather than continuing the curve because I knew I wanted to add white oak molding and tambour there.
Keeping the sides flat also gave my backsplash tile a distinct stopping point.
But there was another practical reason.
My HVAC contractor recommended venting the hood through the side wall of our house rather than up through the attic. The ductwork will exit through the side of the hood, run across the top of the adjacent upper cabinets and then exit through the exterior wall.
The crown molding on top of the cabinets will conceal it.
Keeping the sides of the hood flush with the adjacent cabinetry allowed that plan to work while I could still get the curved front I wanted.
This is why I like to work out the mechanical details before getting too attached to the decorative ones.
Function first. Then make it beautiful.
Building the Main Range Hood Frame
The actual structure was surprisingly straightforward.
I built an upper and lower rectangular frame using 1×6 lumber.
The upper frame finishes approximately 42 inches wide × 16 inches deep, while the lower frame finishes approximately 42 inches wide × 20 inches deep once the plywood sides are added.
Inside the lower structure, I built a second frame specifically for the vent hood insert.
Think of it as a frame within a frame.
The outside frame establishes the overall size and shape of the decorative hood. The inner mounting frame is based on the manufacturer’s specifications and provides solid lumber for the insert’s mounting screws.
I positioned the inner frame toward the front of the hood for proper ventilation and recessed the mounting area approximately ½ inch. That little detail allowed me to later cover the underside with finished ¼-inch plywood rather than leaving the framing exposed.
Before going any farther, I also checked the electrical. I got lucky, the existing outlet from our old microwave happened to be in a great location for the new insert.
This structure is supporting an appliance, so solid attachment matters. I would not rely on drywall anchors for the primary support.
Once everything was centered over the range, level and square, I secured the structure directly into wall studs in multiple locations using 3-inch wood screws.
The Easy Way I Created the Concave Curve
This might be my favorite trick from the entire project.
I did not calculate a complicated radius.
The two vertical pieces that establish the sides of my hood are cut from ¾-inch cabinet-grade plywood.
On the first piece, I marked the depth I wanted the hood to be at several points as it moved downward:
16″ → 17″ → 18″ → 20″
The final 8 inches stay straight at the full 20-inch depth for the white oak detail.
Then I took a thin piece of flexible PVC trim—approximately ½ inch wide—and flexed it through those marks until I liked the shape.
The PVC created the slight angle and soft concave curve I was looking for.
Then I simply traced it.
It was such an easy way to create a smooth curve without trying to figure out the geometry.
I cut the profile with a jigsaw and refined the edge with a sander.
And here’s another little trick: don’t cut the second side independently.
Once I had the first vertical side exactly how I wanted it, I used it as the template for the second.
Perfect one. Trace it. Now they match.
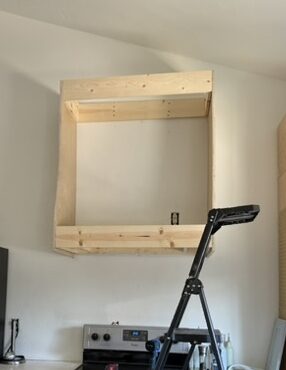
After this, I added two 1 x 3 support boards horizontally spaced evenly down the hood to further support the plywood face.
Creating the Curved Front
Once the two ¾-inch plywood side profiles were secured to my upper and lower frames, the actual shape of the hood was established.
Next I installed two horizontal 1×3 braces between the plywood sides using pocket holes.
Those horizontal supports aren’t actually creating the curve. The plywood side profiles do that. The 1×3s simply provide additional support behind the flexible plywood so it has something solid to follow and attach to.
Essentially:
¾” plywood sides = the shape
two 1×3 horizontal braces = the support
¼” flexible plywood = the smooth curved surface
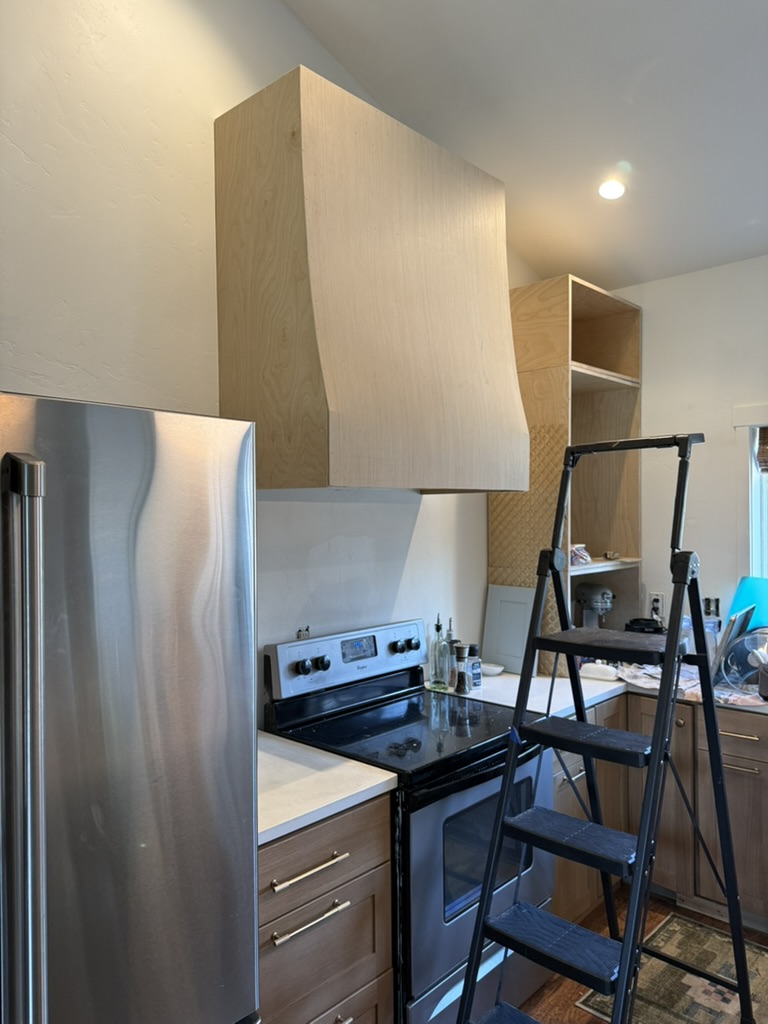
Then I covered the front with ¼-inch flexible plywood.
I started at the top of the hood, carefully lined up the plywood and clamped it securely into position.
From there, I slowly worked my way down the curve.
I didn’t immediately fill the whole thing with nails. Instead, I used my brad nailer strategically as I worked, first securing the plywood around the corners and edges while making sure everything remained lined up correctly as the plywood followed the curve.
Once I was happy with the position and knew the flexible plywood was following both side profiles evenly, I went back and added the remaining brads to secure it.
The key here was getting everything aligned before committing to all the nails.
Take your time. Let the flexible plywood follow the shape you’ve already created rather than trying to force the curve into it.
This is the point where the skeletal-looking frame suddenly starts looking like an actual custom range hood.
How I Created the Venetian Plaster Range Hood Look
I loved the soft, organic appearance of a Venetian plaster range hood, but I found a much simpler way to get the look I wanted.
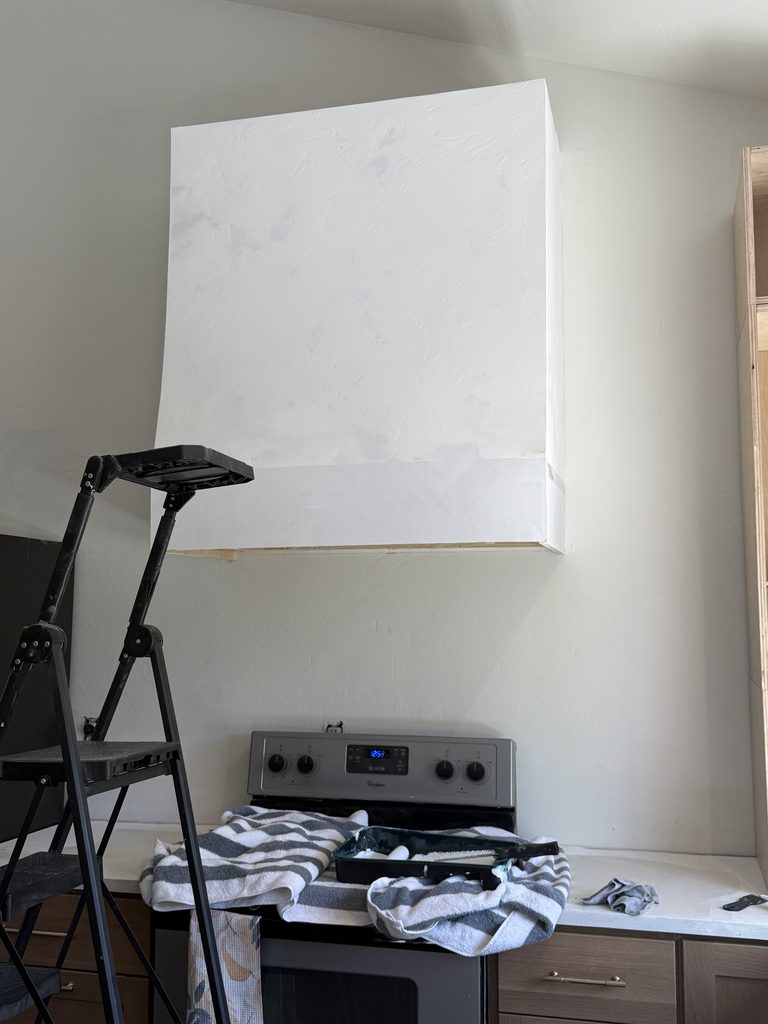
I used regular premixed joint compound.
I applied a thin coat directly over the flexible plywood everywhere above the lower 8-inch wood band.
And I wasn’t particularly precise about it.
That was intentional.
I wasn’t trying to create a heavily textured wall or duplicate true Venetian plaster. I wanted just enough movement in the surface that the finished hood wouldn’t look like perfectly smooth painted plywood.
After the first layer dried, I added a second coat where I needed additional coverage and texture.
Once everything was completely dry, I used a 120-grit sanding block to knock down the rough areas.
The goal isn’t to sand all the texture away.
You’re taking off the harsh spots while leaving behind that subtle, organic movement that gives the plaster hood its character.
Prime, Paint + Protect
Once I was happy with the texture, I primed the entire plastered portion of the hood.
Then I painted it Cotton by Sherwin-Williams in Emerald.
I happened to have satin on hand, so that’s what I used. If I were purchasing paint specifically for this project, I would choose a matte finish.
To knock the sheen back down and give the surface some additional protection in the kitchen, I finished it with two coats of matte water-based polyurethane.
That gave me the soft plaster look I wanted with a more practical, protected surface around the range.
Adding the White Oak Detail
I wanted the plaster hood to feel connected to everything else happening in our new kitchen, especially the white oak lower cabinetry.
That’s why I intentionally left the bottom 8 inches of the hood straight.
At both the top and bottom of that section, I installed ¾-inch × 1½-inch white oak horizontal trim pieces.
Between them, I added ⅜-inch flexible white oak tambour.
Before installing the tambour, I added a ¼-inch plywood filler/backer behind it.
Without that extra layer, the thin tambour sat farther behind the ¾-inch-deep white oak rails than I wanted. Building the center forward slightly gave the entire band a much more intentional finished profile.
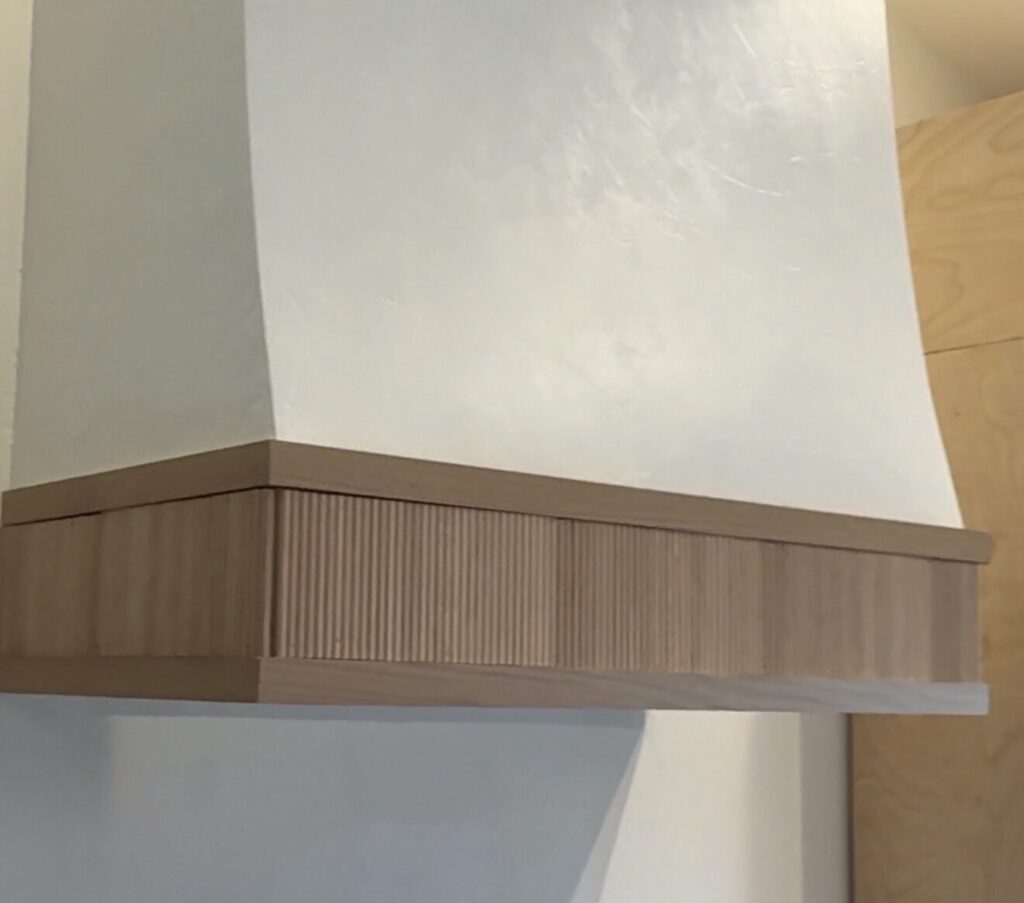
The white oak detail ended up doing exactly what I hoped it would—it connects this big plaster feature back to the wood cabinetry and makes the hood feel like it belongs in the rest of the kitchen.
One Thing I’d Do Differently
I’d glue the tambour instead of nailing it.
I attached mine with a brad nailer, and structurally it worked perfectly well. But that left me with tiny nail holes in a beautiful finished wood surface.
The tambour is decorative rather than structural. It doesn’t need nails to carry a load.
If I built this again, I’d glue it to the ¼-inch plywood backer and clamp it—or apply even pressure—until the adhesive cured.
Same beautiful detail. Fewer holes to fill. Cleaner finish.
And if you do use brads around this lower portion, check exactly what’s behind them before pulling the trigger.
The appliance body extends into the space behind this band on my hood. I used approximately 1-inch brads with glue rather than unnecessarily long nails. Your construction may be different, so verify the available depth first.
Installing the Insert + Finishing the Underside
The vent hood insert mounts upward into the dedicated inner frame and screws securely into the solid lumber I built around it.
Because I recessed that assembly approximately ½ inch, I could then cover the underside with ¼-inch finished wood panels that coordinate with my cabinetry.
But I didn’t permanently nail those panels in place.
I attached them with small screws that closely match the wood finish.
That was intentional.
If I ever need to remove or service the insert, I can simply unscrew the finished panels and access everything without tearing apart the hood.
It’s one of those details you barely notice when the project is finished—but I’m very glad I thought about it before closing everything up.
Before You Build Your Own Plaster Range Hood
The biggest thing I want you to take from this project isn’t my exact measurements.
It’s the method.
Start with your appliance and the manufacturer’s installation requirements.
Then determine the proportions that look right in your kitchen.
Plan the ventilation, electrical and future service access before you build the decorative structure around them.
Use plywood profiles to establish the shape. Use flexible trim to draw a curve instead of making the geometry harder than it needs to be. Add horizontal bracing between those profiles, skin the structure with flexible plywood and then make the finish completely your own.
You could create a subtle plaster finish like mine, use actual Venetian plaster, change the wood species, eliminate the wood altogether, add fluting instead of tambour or create a completely different lower detail.
That’s what I love about building something yourself.
You don’t have to find exactly what you want. You can create it.
And after overthinking this plaster range hood for months?
I’d absolutely build it again.
A little note: Some links in this post are affiliate links, which means I may earn a small commission if you buy through them, at no extra cost to you. As an Amazon Associate I earn from qualifying purchases. I only share products I love, use, or would put in my own home. Thank you for supporting Design with Rhonda!
You may also like

The things I use, love and can’t stop telling you about.
Fashion, favorites and a little bit of life beyond the house.
Projects, renovations and the know-how to make those big ideas actually happen.
Finishing touches, seasonal inspiration and the details that make a home feel special.
Beautiful rooms, smart design decisions and ideas you can actually use.
What you’ll find around here


join me on instagram